
March 18, 2022
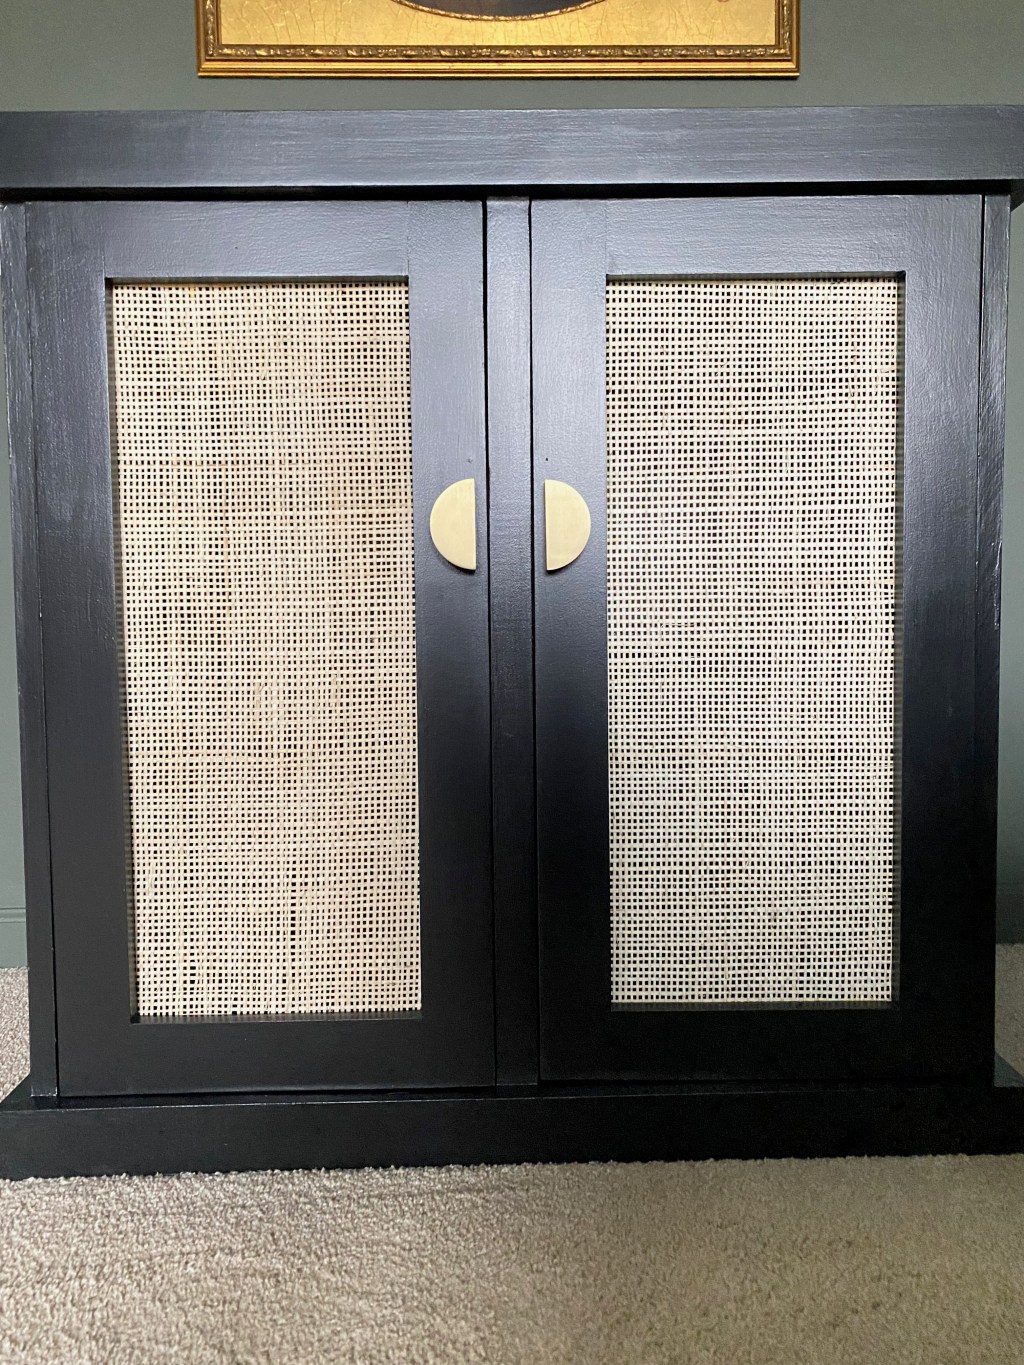
What is a chutch you ask? It’s a word Husband and I made up to describe this piece – a changing table-turned-cabinet/hutch. Many moons ago, Husband and his dad built a changing table together. It was strong and sturdy and my FIL customized it for what I wanted – for me that was pull out shelves so I didn’t have to dig around trying to find things with a baby on the table, I could just pull out the shelf and grab what I needed from baskets. My MIL even made fabric inserts for the baskets that matched the nursery. We’re long past diaper days – my oldest just registered for high school courses – but we didn’t want to get rid of the piece because it means so much to us. It’s been sitting in various rooms of our house, most recently, a corner of our dining room, piled with random stuff. We finally came up with an idea, so here’s what we did.

Since the piece wasn’t going to function as a changing table anymore, I wanted to remove the side rails to make a smooth top. After a bit of sanding and wood filler and more sanding, we got it pretty much smooth. I think some of the trim pieces were damaged with the disassemble but we were able to replace those pretty easily. You can see the trim detail I’m talking about here in the picture to the right.
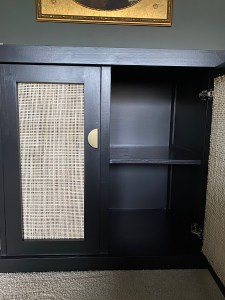
Because I’m so awesome at this blogging thing, I don’t have any before pictures (I mean, I’m sure we do somewhere but I’m not digging through 14 years of pictures) so allow me to describe it to you. The changing table was very solid – it had wooden side rails on three sides at the top, as is customary for a changing table. It had two shelves, both with sliders and some simple trim pieces on the side insets. For this upcycle, we knew we wanted to put doors on the cabinet so Husband did lots of research on inset doors and decided to give it a go. In order to have doors, we needed to remove the shelves and rail system. When I say we, I really mean Husband. He’s the one who really did all the work — I just supervised. Anyway, In order to provide some structural stability and allow for attachment points for new fixed shelves inside, he had to add a vertical piece of wood on the back and a piece in the middle of the front so we’d have two doors. I can’t give you a tutorial on the door build or the how-to of the modifications-because it’s not my thang but I can tell you, particularly with the doors, it involved a lot of playing around to get the hinges just right.
I decided to paint it SW Tricorn Black (surprise!) and we wanted to try out the new paint sprayer we bought for another project that still hasn’t happened yet — that turned out to be QUITE the adventure. The sprayer worked great once we figured out the right pressure but it uses a TON of paint. You cannot use this sprayer for small jobs, you need AT LEAST a gallon of paint. This is also where we learned that my face is allergic to something in paint. I woke up the next morning with a wicked rash that I ended up needing to go onto steroids for! Anywho, the sprayer made quick work of the painting job so the rest was the tedious process of applying finish. For years we’ve used Minwax Polycrylic – it doesn’t yellow over time and comes in several finish options such as Gloss, Matte, etc. It does tend to get little air bubbles when applying but that can be mitigated in a few ways – use a synthetic fiber brush, keep the brush wet with product, use long strokes, and sand between coats with a very fine sandpaper. For this project we actually used a find steel wool and it worked GREAT, even better than sandpaper IMO.
I thought I’d save money by doing some caning/rattan inside the door frames instead of wood. After a bit of research, the woven material was a bit more expensive than I thought it would be but we carefully calculated how much we’d need and I ordered it here. Spoiler alert – we had a little miscalculation (or miscommunication – we’re not sure which) and ended up having to order another roll of material, which ended up costing even more but, that’s the way it goes. Make sure you soak the rattan for about 30 minutes before you try to apply it – this makes the material more pliable and allows for a good, tight fight once it is attached and dries out again. We soaked ours in the bath tub 🙂 We painted the doors first before gluing the rattan onto the back of the door.
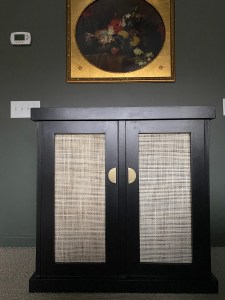
The doors aren’t perfect but I think they’re amazing considering this was Husband’s first attempt at inset doors, and cabinet doors in general! And I just love these cool, modern handles! I don’t think this is the final home for the chutch but I couldn’t wait to show it to you! And actually, since I started writing this post a week ago (yep, takes me a long time to do some of these posts) we moved it to the wall opposite our bed to hold the TV. It’s not the right fit as far as width – the TV is wider than the chutch – but it’s the right height so we can see the TV over our feet in bed. Eventually, I’d love to get a frame TV in here and make a gallery on part of that wall, but – ya know, priorities 🙂
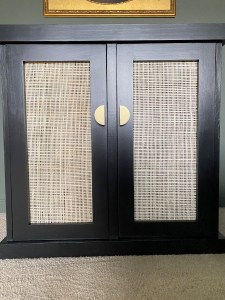
Here’s one more view for ya!
This post contains some affiliate links – I could earn a small commission if you choose to shop using those links – which, of course I would greatly appreciate!
