
April 25, 2022
**This post contains some affiliate links. Shopping these links allows me to earn a few dollars to pay for my materials but doesn’t cost you a thing! And I so appreciate it!**
I recently undertook a project that I was grossly unprepared for. You’d think that with the inter webs being as robust as they are now, it wouldn’t have been a problem. And it probably isn’t. Except I didn’t really spend a lot of time doing research. I found one blog, I think, and then kind of decided to wing it. And honestly, the prep and painting wasn’t the hard part. The hard part was the stencil. I created Instagram reels for much of this project so if you’re interested in those, hop over to @dont_should_on_me. So let’s hop in to this project to give you an idea …

Floor Prep & Priming
We’ve already established I’m lazy so rather than mop the floor and THEN sand and then mop again, I just went straight for sanding. You need to rough up the tiles a little so they’ll accept paint. I used 80 grit sandpaper on the orbital sander. Then I vacuumed the floor really well using a brush attachment. I used stripper at a 5:1 dilution. I made sure to wear chemical resistant gloves and eye protection. After scrubbing and wiping, the floor had to sit for 48 hours because you need the tile to be good and dry. Meanwhile, I went ahead and taped the bathroom so I’d be ready for primer. This was my first time using Frog Tape and I have to say, I was very impressed! It stuck even to the carpet transition between the bathroom and bedroom! Once I was ready to prime, I used a brush to cut in and to cover the grout lines, then rolled the rest. More waiting for the primer to dry – 24 hours (ish).

Paint
This is where I started to have serious doubts about what I’d gotten myself into. Sherwin Williams didn’t have any of their usual Floor and Porch paint (supply issues) so they sold me a product usually reserved for commercial use called Armor-Seal Tread Plex that they colored for me – Iron Ore and White Flour. The usage instructions weren’t even on the can – I had to go digging through the MSDS (Material Safety Data Sheet) online to see the details of what kind of brush/roller I needed, time to recoat, and time to dry. There was a fair amount of technical information but here is what I came away with:
- Use a paddle stirrer attachment
- Use solvent-friendly brush and rollers
- 1 hour dry time to recoat
- Cures in about a week
- There are warnings on the can about cancer – yikes
I’ve never used a paddle stirrer attachment and was anxious to get started so I ignored this recommendation. I implore you not to do the same, at least for this particular paint product. The top layer was almost all water and it took a significant amount of stirring with a stir stick – like, SIGNIFICANT. And even then, the paint felt really thin during application. I was pretty sure (like 70% sure) that my brush and rollers were solvent friendly. The cancer warning scared me so I made sure not to get the paint on my hands and wore safety glasses and an N-95 mask (yes, I know I should have worn a different respirator – I am stupid and stubborn). One other thing I found VERY helpful was keeping a little hand-vac close so I could suck up any loose debris (dog hairs) as I went.
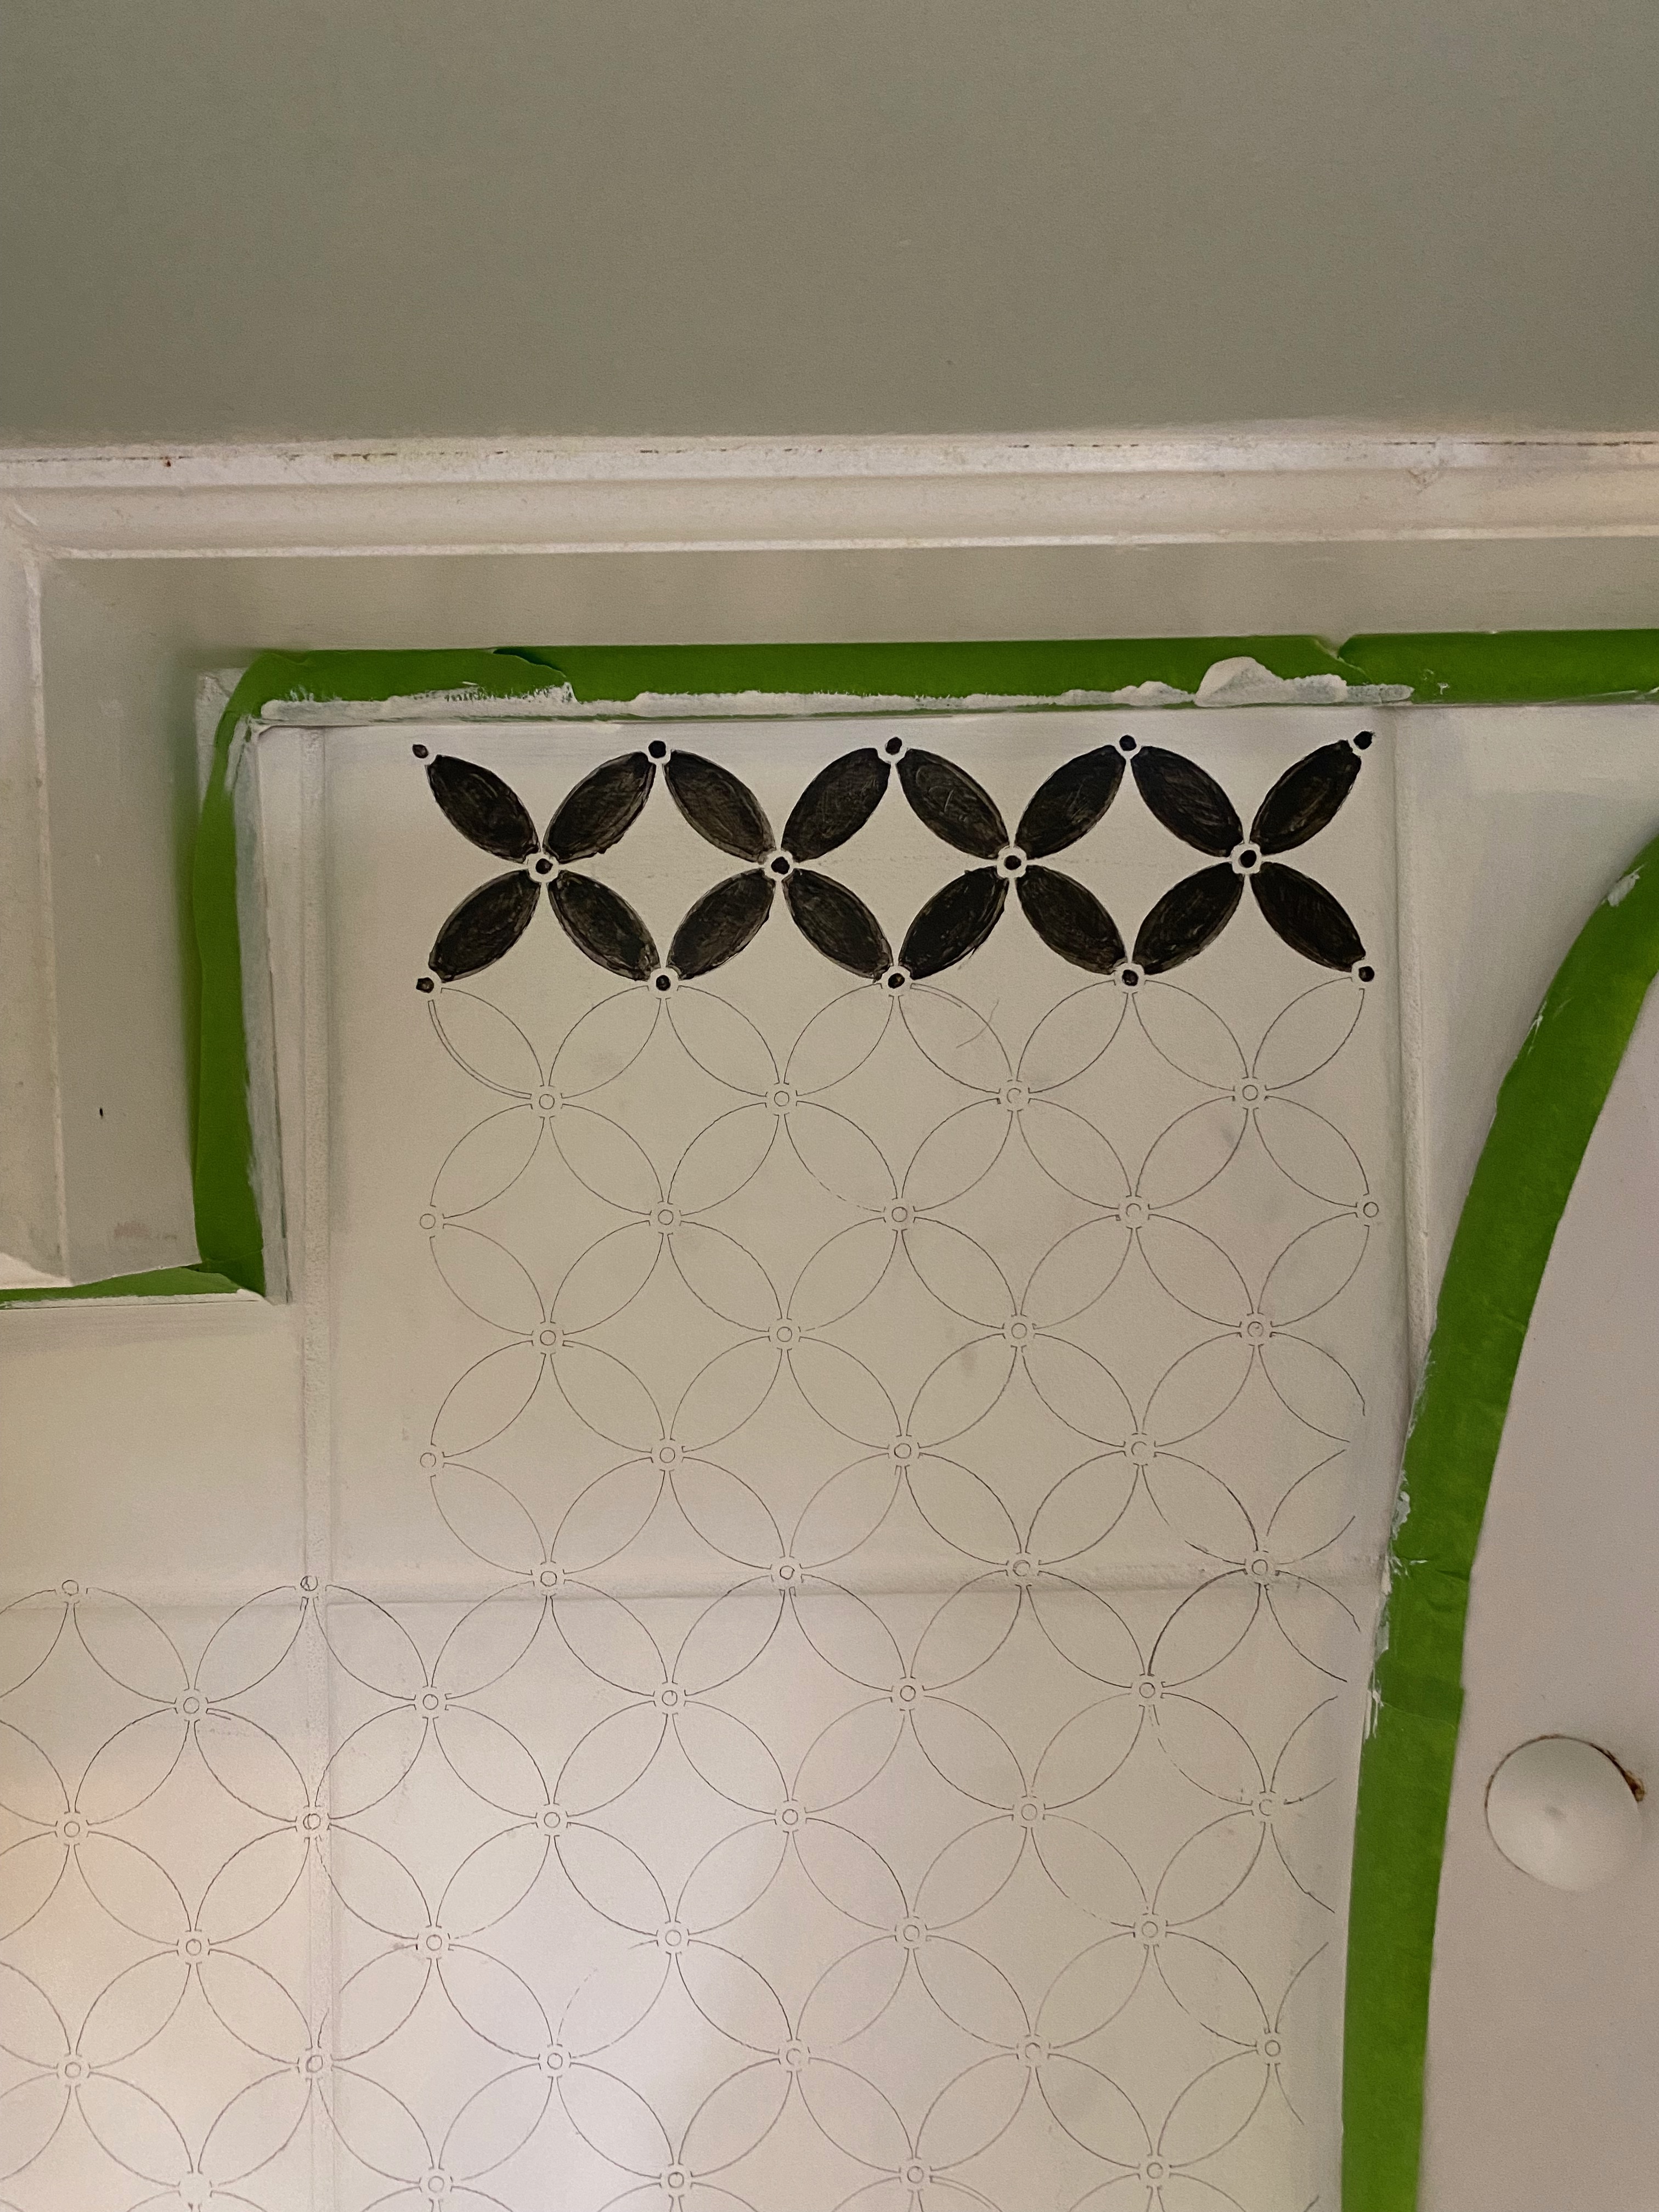
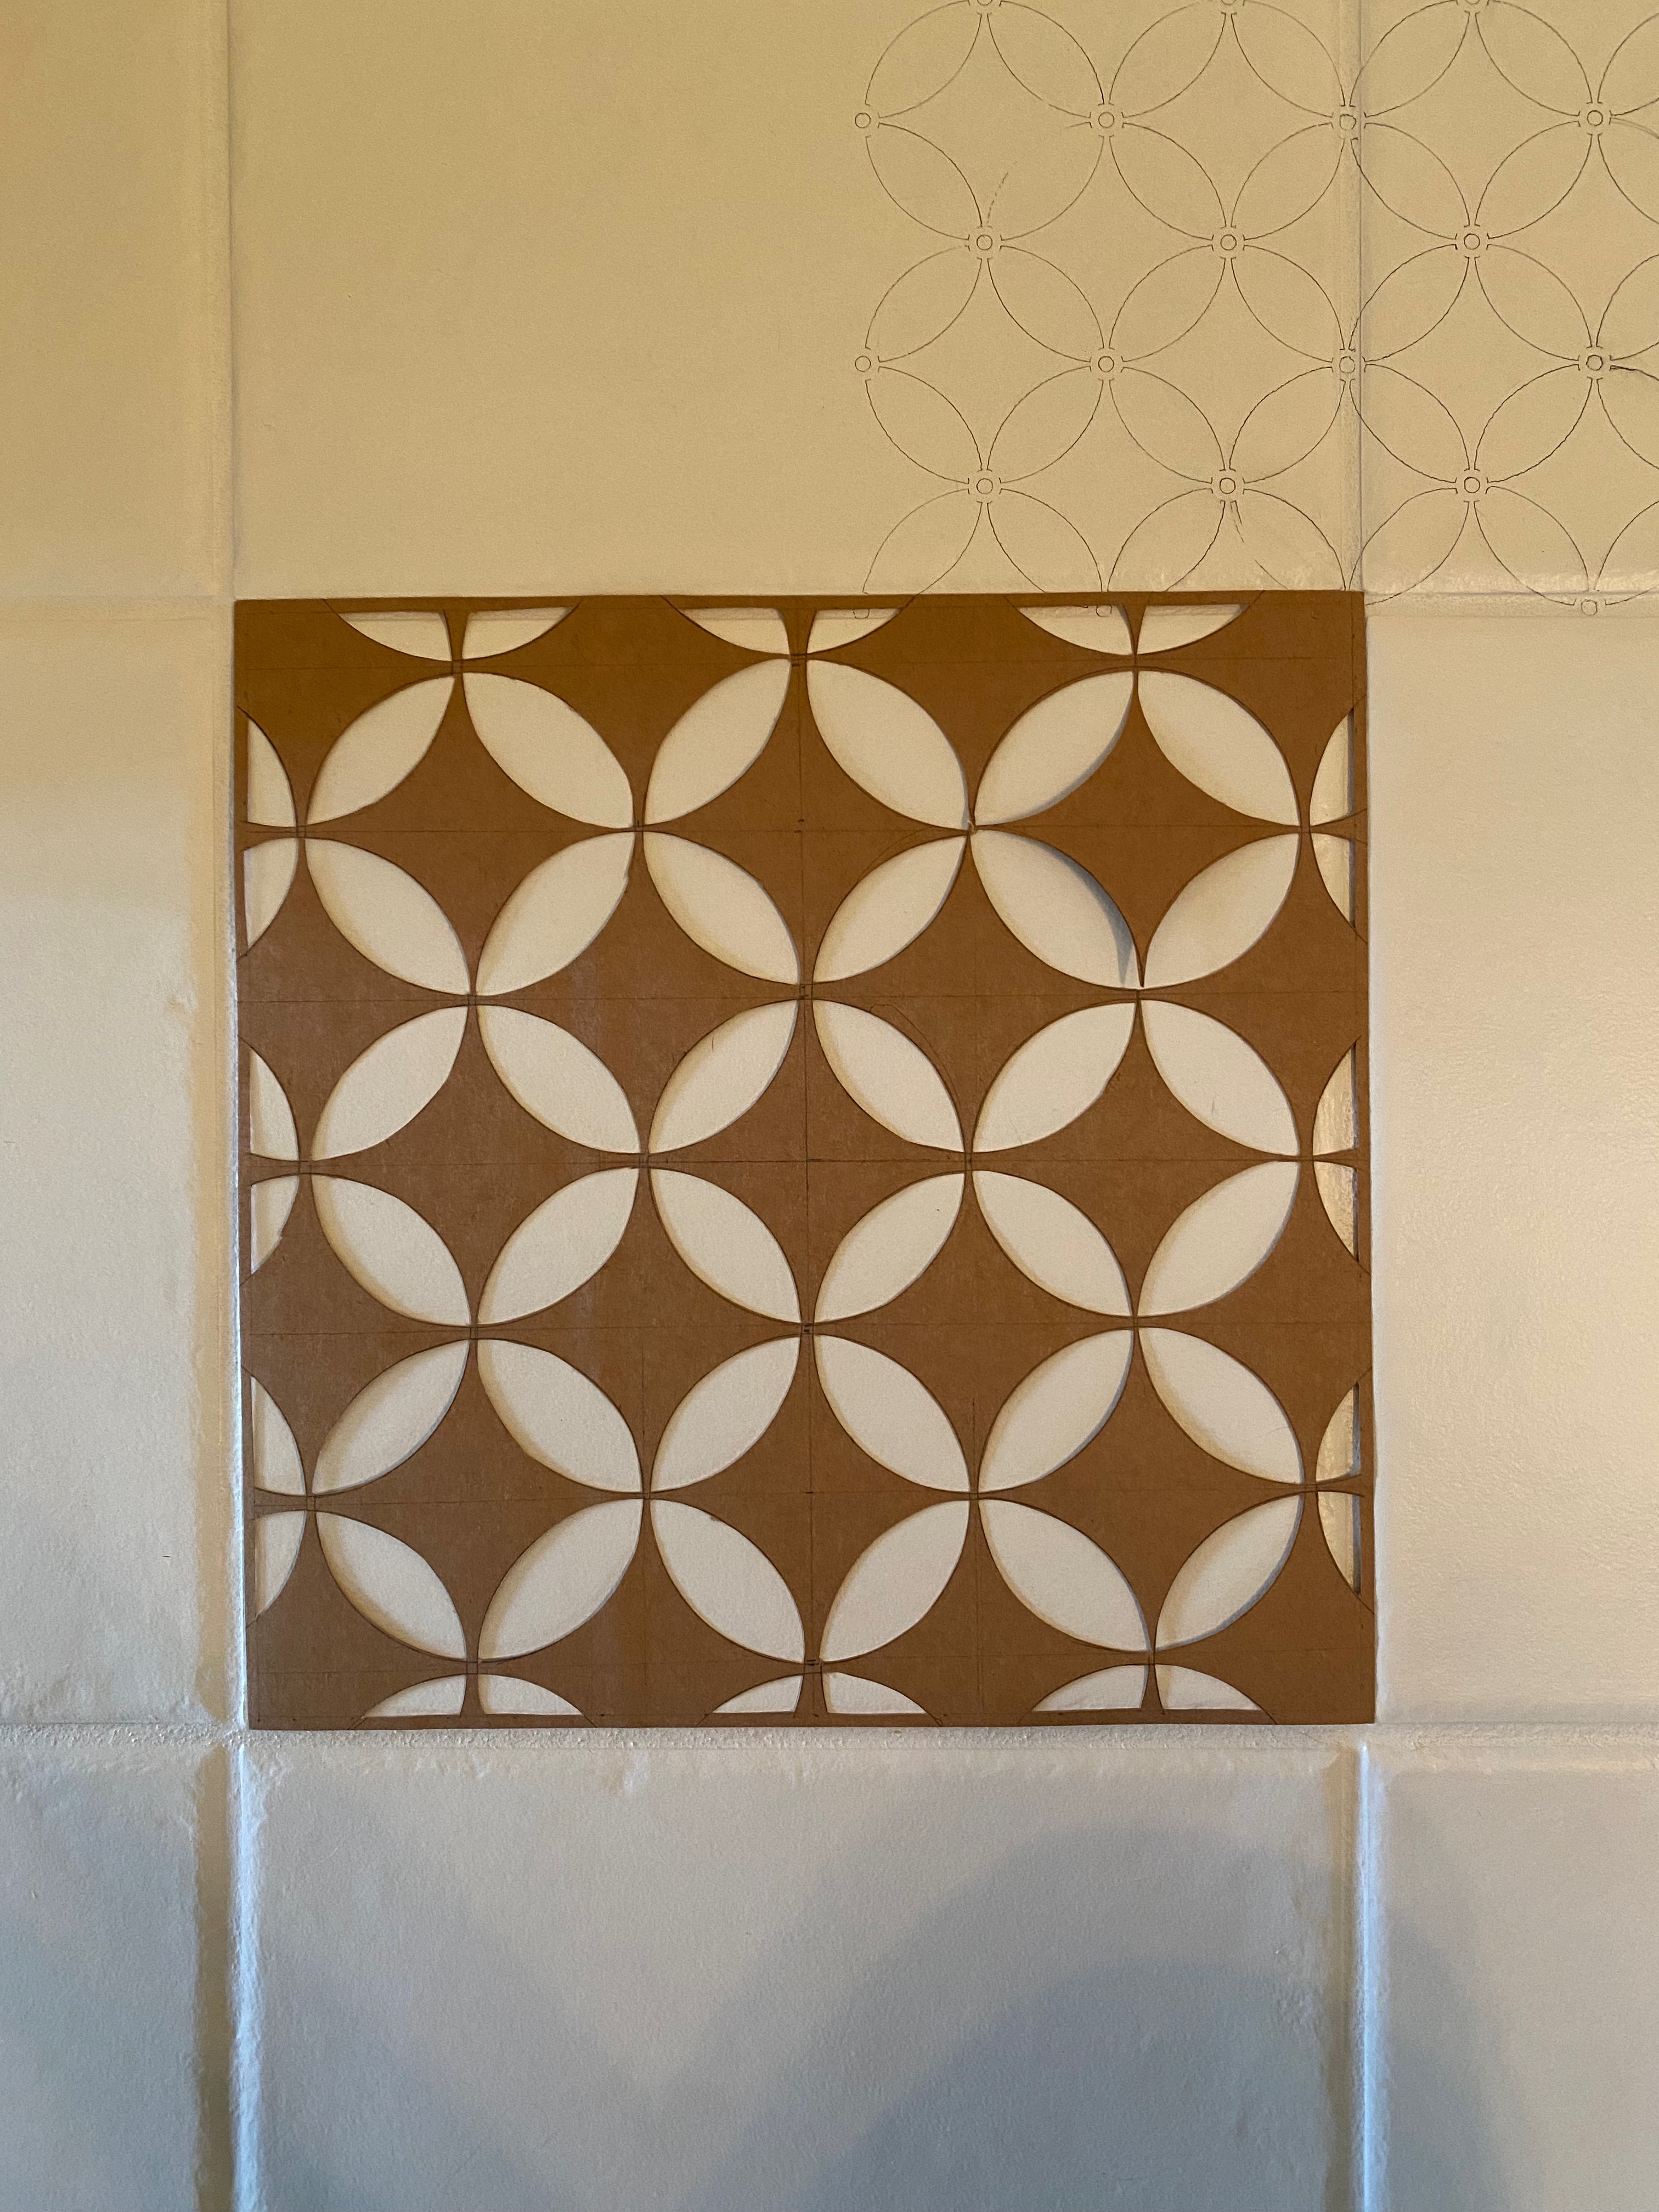
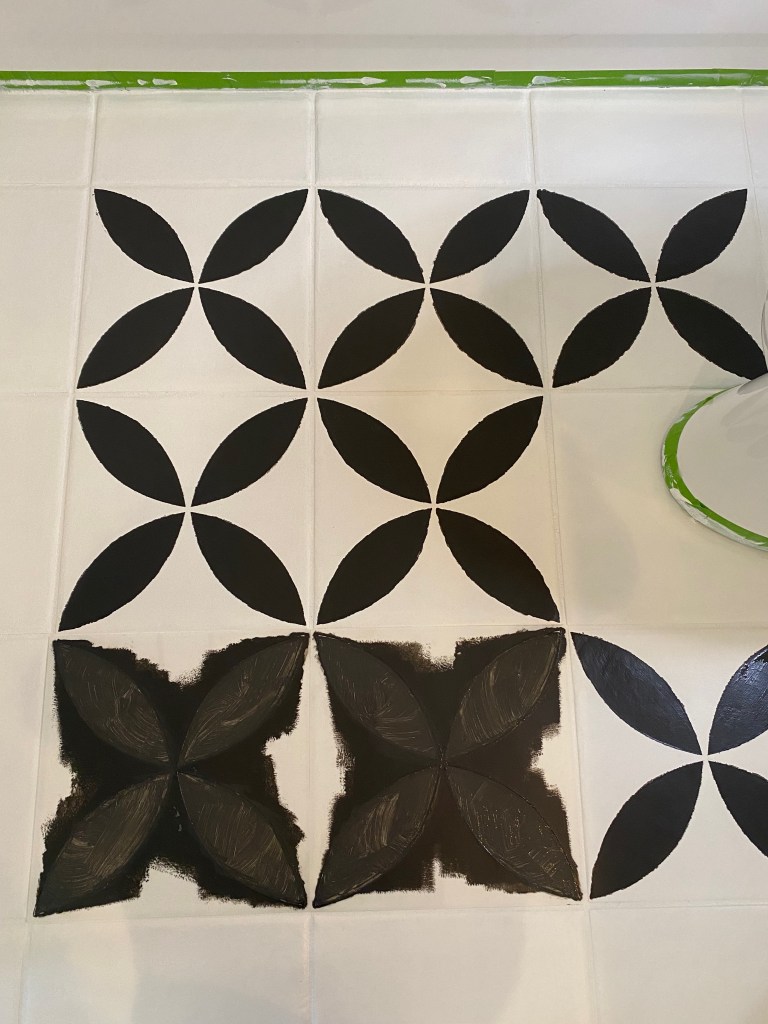
After two coats of the base color, White Flour, it wasn’t looking so great and I started having lots of doubts. However, a third coat took care of that so it was on to the stencil. I decided to go get a paint mixer attachment for the drill since the base color had not mixed well. That was a good choice – even with the drill attachment, it took about 5+ minutes to really get the paint mixed well. I knew the stencil was going to be a long process but I was willing to do it. Until I started tracing – I spent most of a day tracing that damn pattern onto half the bathroom floor. This was going to take forever! And then I spent almost an hour painting four little ‘flowers’ (see photo) and I decided this was NOT going to work. Pivot. Ok, maybe I can make my own stencil by making the pattern slightly larger and cutting out the parts I wanted painted black so I wouldn’t have to hand paint them all. We went to Michael’s as part of our date night and gathered a bunch of supplies and the following morning, I spent several hours coming up with a pattern mockup on card stock. (see photo) The mockup looked great but I was struggling with how to make the patterns match up on each tile – I was trying to avoid having to paint the grout. Then an angel from the heavens (Shalonne from @thebackuphouse) sent me a link to a larger stencil and I immediately ordered it. My friend Lauren from @goodtroublehome suggested Easy Tack to help the stencil stick on the floor and minimize paint bleeding. Note: you CAN get it on Amazon (bonus you don’t have to leave the house), but it’s actually quite a bit cheaper if you go get it at Michael’s 🙂

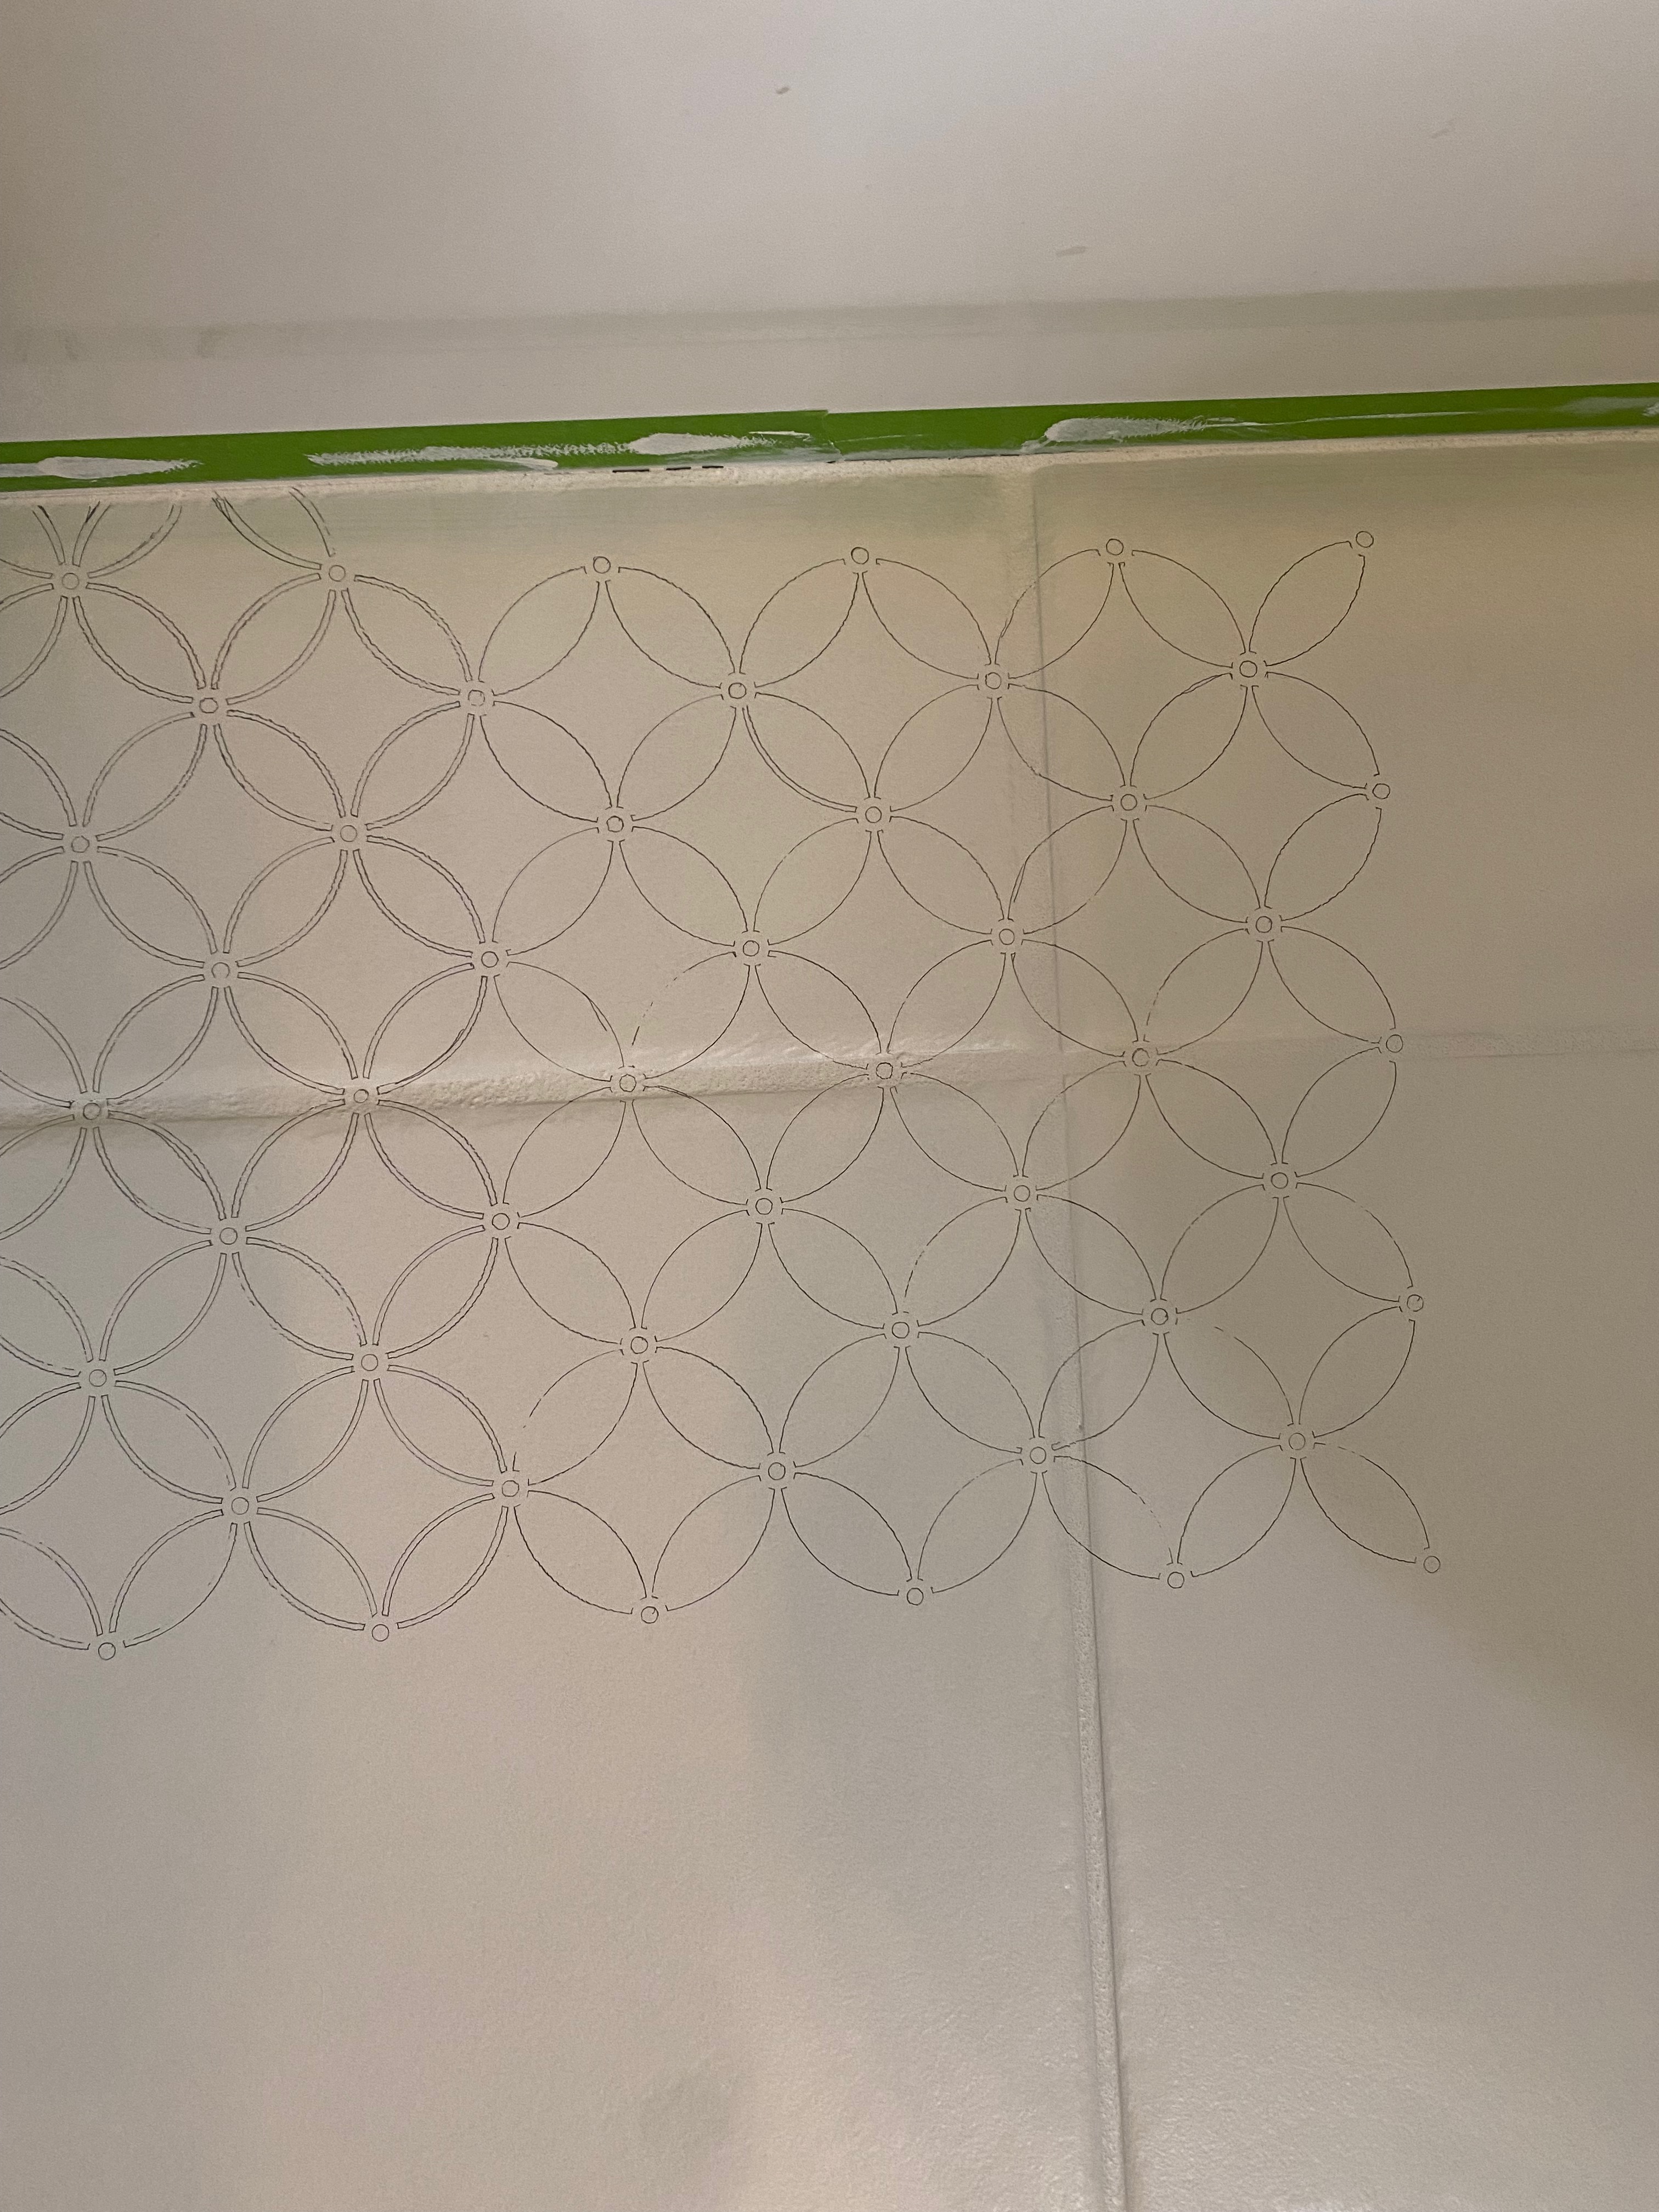
When the new stencil arrived, it was a bit bigger than I originally thought but I just wanted to get it done, so decided to go ahead with it. Plus, it came with two stencils so I could be a bit more productive! But first I had to clean off the pencil – I wanted to be efficient. Neither water nor a baby wipe worked. So I moved to rubbing alcohol and it worked like a dream, except in the grout lines, where I had to use an actual pencil eraser. But then I looked at my hands and I had paint residue on them – CRAP! I was starting to feel very defeated. I really didn’t want to recoat the floor. From afar, the floor still looked ok, so I decided to go ahead with the stencil process.
Well, I learned the hard way the proper (well, improper) way to use Easy Tack. You gotta let it “dry” on your stencil before you try to stick it on the floor. If you don’t, you’ll get sticky residue on your floor (this comes back to haunt me later). Because I didn’t use the Easy Tack properly, the first two stencils were a mess – I only rolled and there was lots of bleeding – I was crushed. Lauren helped talk me off the ledge and I decided it didn’t look terrible unless you were crouched down close to it, which normal guests would not be doing. For the remainder of the floor, I approached it a little differently. I used a small foam brush to carefully “line” the edges and then a larger foam brush to fill in the main part of the pattern. This method took a bit longer but made the edges a bit neater. It meant I had to do several coats of the Iron Ore BUT since it only takes an hour to recoat, I was able to paint a little then go do other chores, paint a little more, do more chores, etc. The whole stencil process took a couple of days once I got going.
The Tricky Parts
The large pattern stencil was super convenient – except for the tricky edge pieces, like along the wall and toilet, places where there wasn’t a full 12×12 tile. For these, I ended up tracing the pattern onto card stock and cutting out the ‘leaves’. Then I traced those onto the tricky partial tiles and hand painted using the foam brushes. Thankfully, there weren’t a ton of edge pieces and I’d say the trickiest part was painting near the vanity toe kick because the brush handle wouldn’t fit very well.
Removing the Easy Tack residue turned out to be a problem. I tried soap and water, hoping to be as gentle as possible on the new paint. However, that wasn’t strong enough. So I grabbed some Goof Off professional strength and very very carefully started rubbing. You know where this is going — know what gets off adhesives? Solvent. Know what takes off paint? Also solvent. Know what Goof Off is? Yep, solvent. **Sigh** So, I stopped with one bare spot and several sticky spots left on the floor. And that’s where we are weeks later. I’m wondering now if I should have let the paint cure for a week before trying to remove the adhesive – I may try Goof Off again now that it’s been a few weeks. What’s the worst that can happen? I have to touch up more paint? Might as well make it worth it to pull out all those supplies, lol.

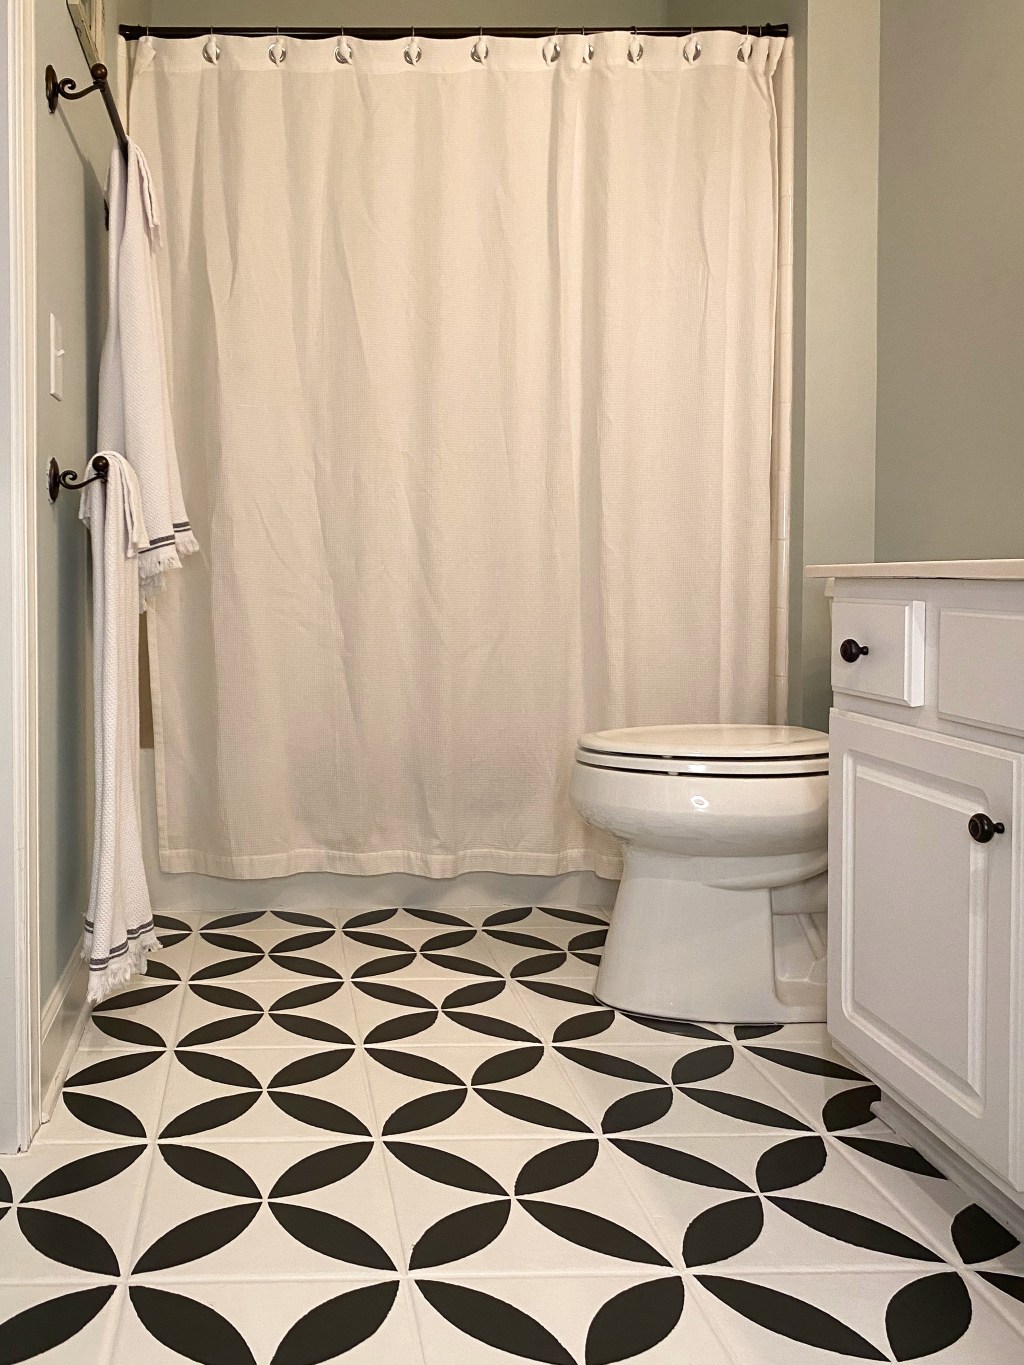
Would I paint floor tile again? Probably in a small area. Definitely not in a high-traffic daily use area like a kitchen – unless I planned accordingly and set up a temporary kitchen in another room. I really want to paint the laundry room floor but I don’t know that I can take it out of commission that long. I may try another alternative like peel and stick from FloorPops – It’s supposed to be a highly durable, permanent adhesive tile. And I have a lot of floor paint left, so I will use that on the linoleum tile in our upstairs bathrooms sometime this summer when my kids are away for a week.

**This post contains some affiliate links. Shopping these links allows me to earn a few dollars to pay for my materials but doesn’t cost you a thing! And I so appreciate it!**
